If you would like to test latest (yet already quite old) Candle on Linux machine, you could face the same problems as I did – so few tips how to make it work.
I still think UGS platform is a better choice in many cases – but sometimes Candle may be necessity (I have found problem with UGS and Fusion 360 gcode files)..
Anyway, you may face this kind of compilation errors and configuration problems with latest 1.2b source code: Continue Reading
It’s time to make it look better, I don’t dare to say good :). So I’ve printed a case with all holes required, and now I’m soldering everything up.
I thought about creating dedicated PCB for it, but it probably would require double side one, and so far I’ve been only making one side PCB on my CNC mill. Other problem I’ve seen was the WiFi antenna on TTGO board. With single PCB for all components, It would be shielded either by PCB or LCD or wires. This board does not have external antenna connector (some other does). So I’ve decided I’ll put ESP32 board separately and at 90deg angle close to the plastic case. This way signal should be not blocked anyway. Continue Reading
So far so good – most of the stuff is done. Currently I’m tuning PID usage, and what’s left is traversing program in time – but that’s easy.
To tune PID parameters and test it, you can use simple halogen light bulb (or car light bulb) connected with thermocouple. This is a good heat source to around 100C and it’s easy to see when it’s working 🙂
Kp=10, Ki=5, Kd=1
Kp=10, Ki=0.1, Kd=0
You just have to switch SSR to DC-DC one (for kiln you probably will use DC-AC). For easy testing I’ve prepared “Quick program” in LCD menu – where you can set one program step. Provide desire temperature, time and dwell – and you can run it.
Actually this is about making quick (as quick to build – not fast charging) car charger for you scooter, but there is nothing (except timeeeeee 😉 ) that forbids using it with QC/PD power banks or chargers – it will work, simply it will take ages to charge it.
It should also work for every other scooter (not just Xiaomi) – just check the required voltage and current.
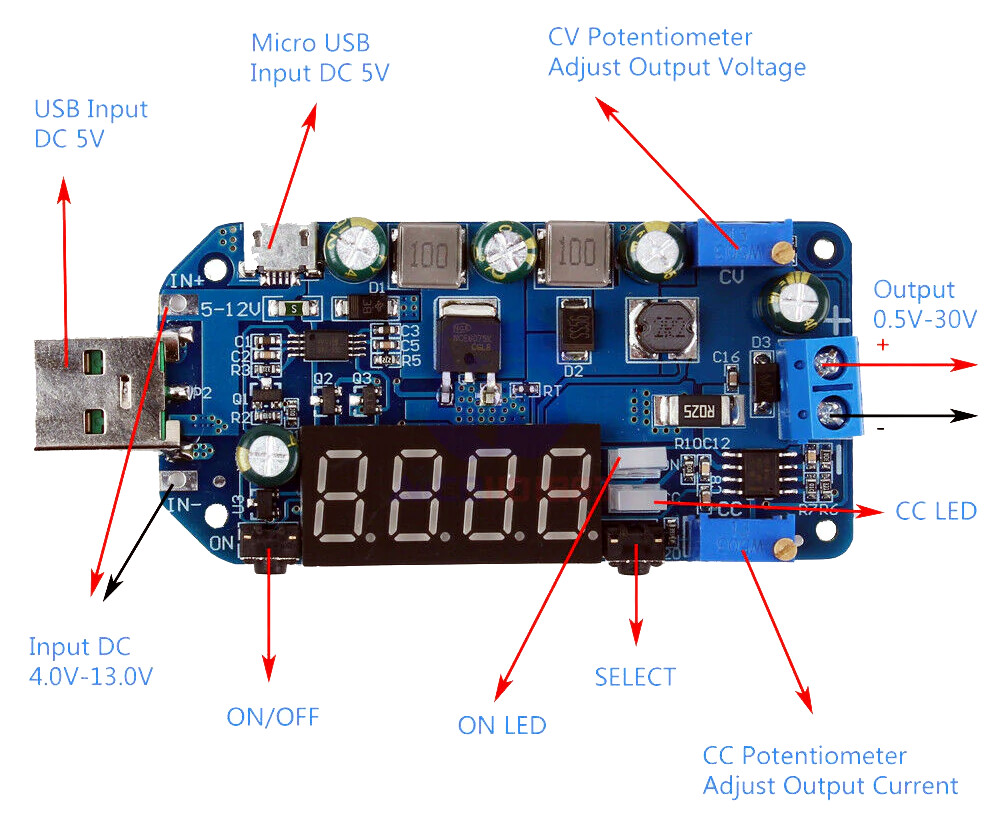
A quick update to my previous article about DIY DJI Mavic Air battery charger. Recently I’ve found quite interesting board on AliExpress, that can be used as universal all-in-one charger.
So first of all, as a reminder, to charge Mavic Air battery we have to supply somewhere around 13,2V. This voltage is usually not available both on USB and in the car lighter socket. With USB we could have, with some new Power Delivery capable one, above 12V – but they are still quite rare and expensive (I’m talking about power banks – not chargers). In car usually we have 12,2-12,4V – when charging it can go higher, but directly on battery – it should not in lighter socket. Continue Reading
After some experience with controlling my ceramic kiln with Linux over cron scripts, I’ve moved to Chinese PC410 controller. But (probably) because it was knock off, it had removed plenty of useful features (you can read about it, in Polish here) I’ve decided to do my own controller.
I’ve looked around Internet for existing solutions, and found one – interesting enough, but still lacking very important future for me – Internet connectivity. I need to be able to monitor my kiln overt network, see what’s going on and be able to turn it off.
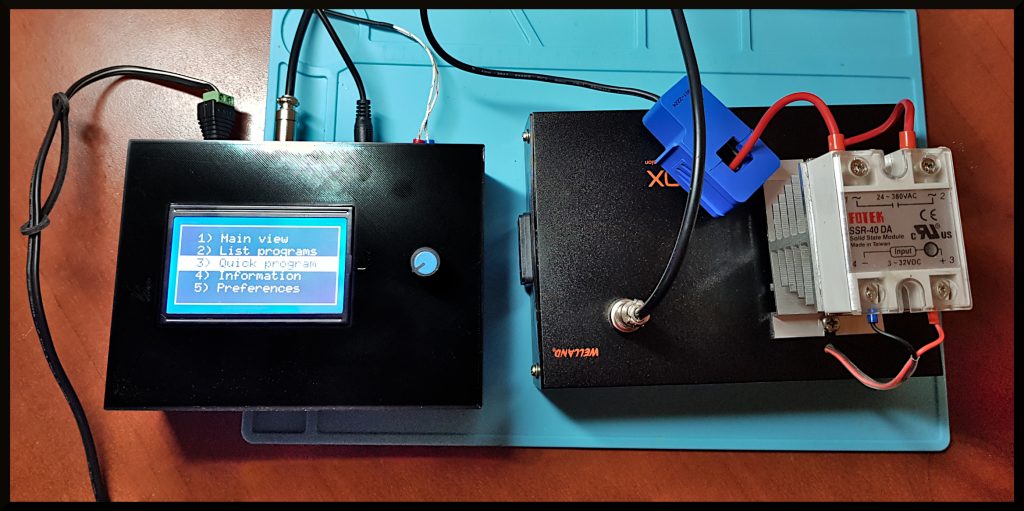
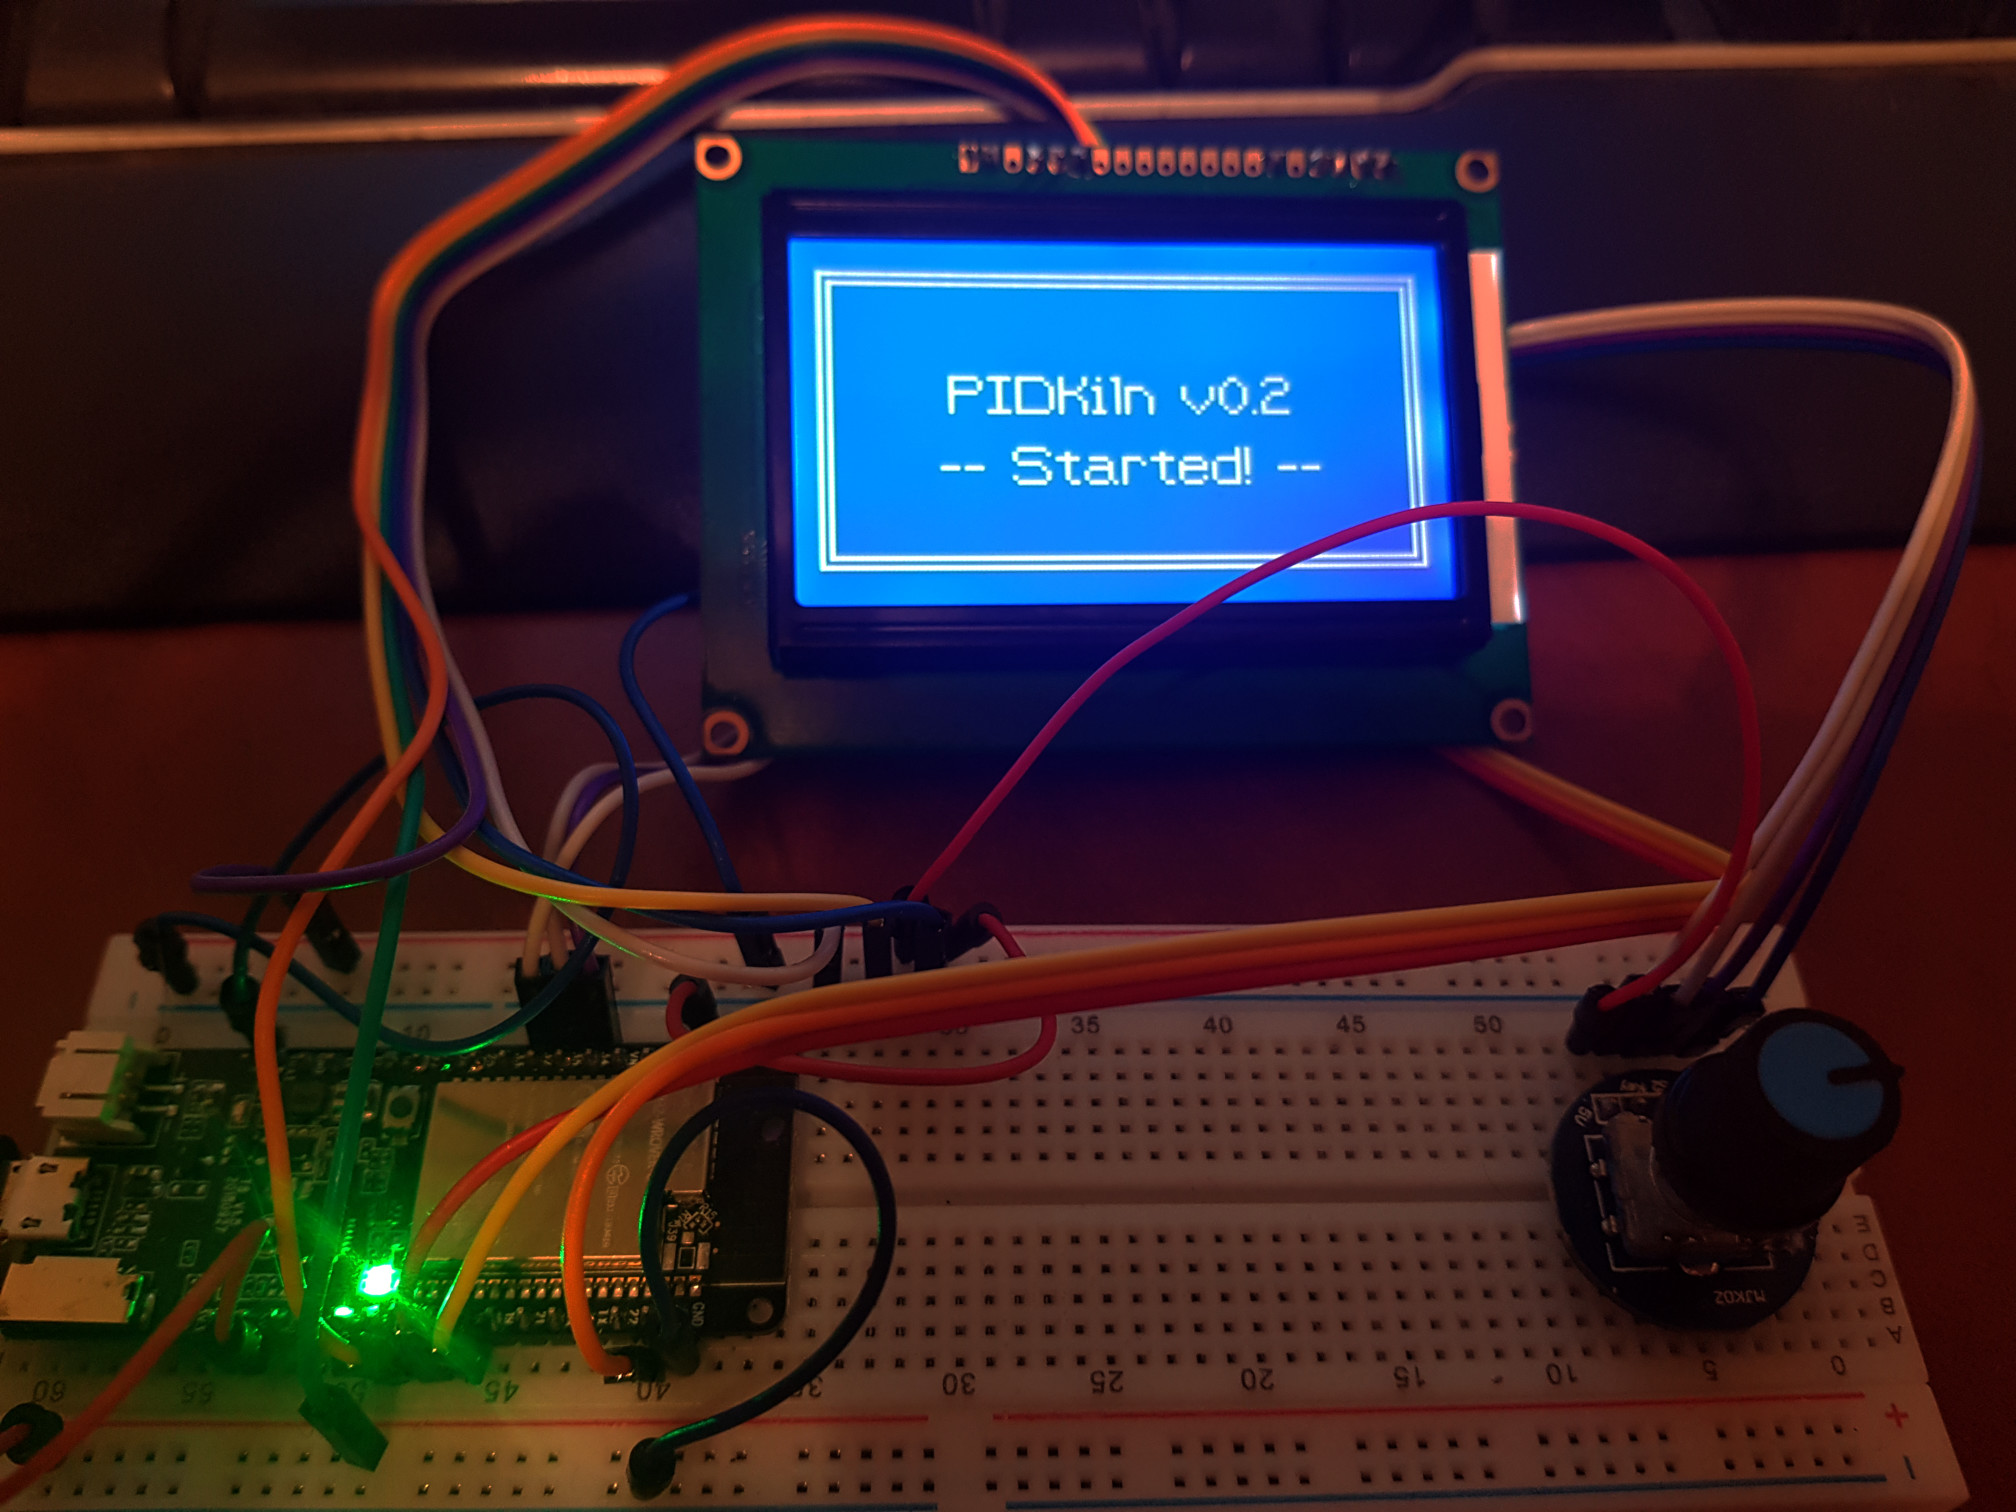
So this is how it came to life my controller – based on ESP32 chip, feature rich PID controller for kiln, with network connectivity, local LCD display and all possible safety features I needed.
You can download project sources from github and build your own. All required information you will find there. Here I’ll show how to build it in step-by-step process.
What’s done already (updated 19.09.2019):
PIDKiln assembled – all components
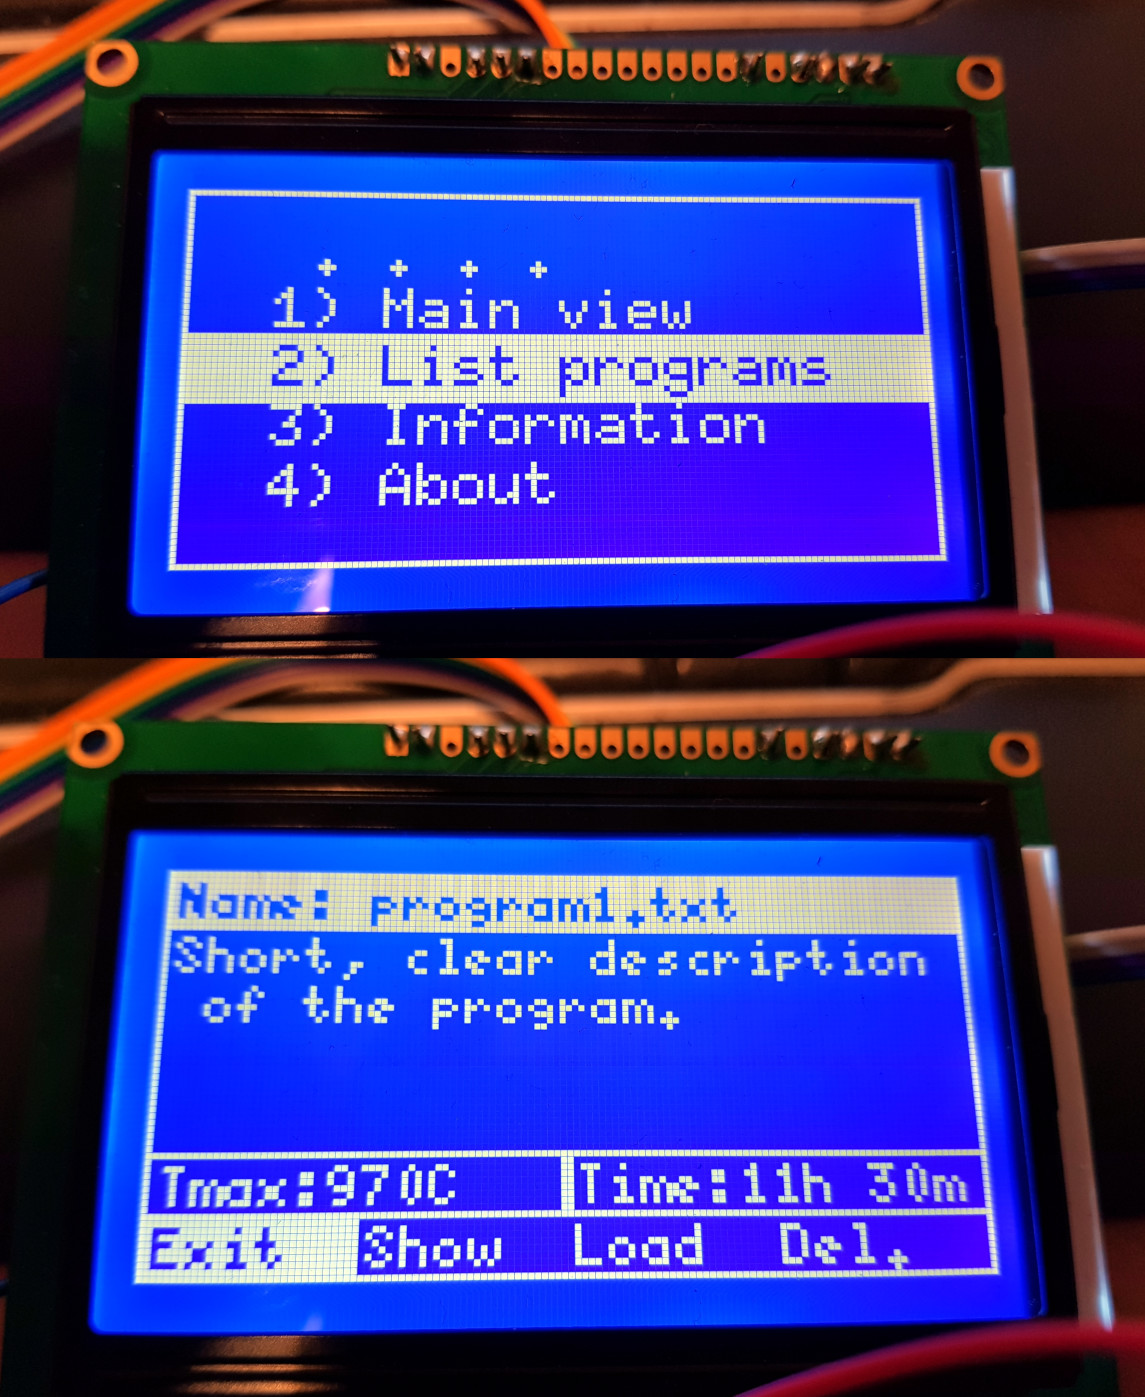
All common procedures and functions for LCD, input (encoder) and Webserver
Program handling like upload, delete, show
Program loading to memory and full sanitization
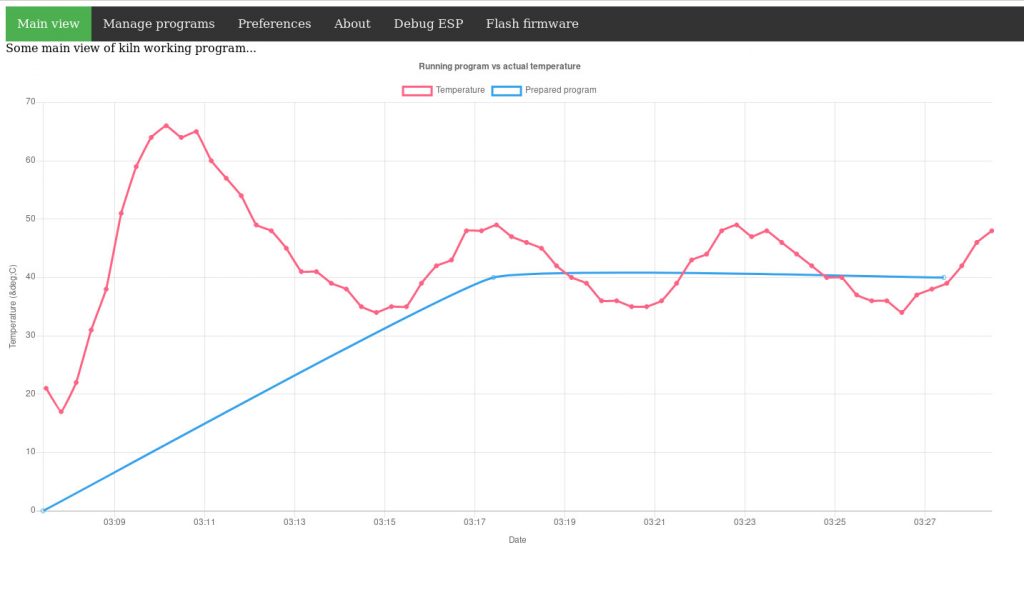
Preference handling, information screen, and graphs for WWW a tiny for LCD 🙂
Lately, after long investigation, why ma laser is not working with the full power, I was forced to replace lens in it. You can read about the whole testing process here. Anyway, after I received spare lenses, and replaced it I started to wander if the focus distance has changed?
Since this was a bit tricky, I think it will be useful to write it somewhere.
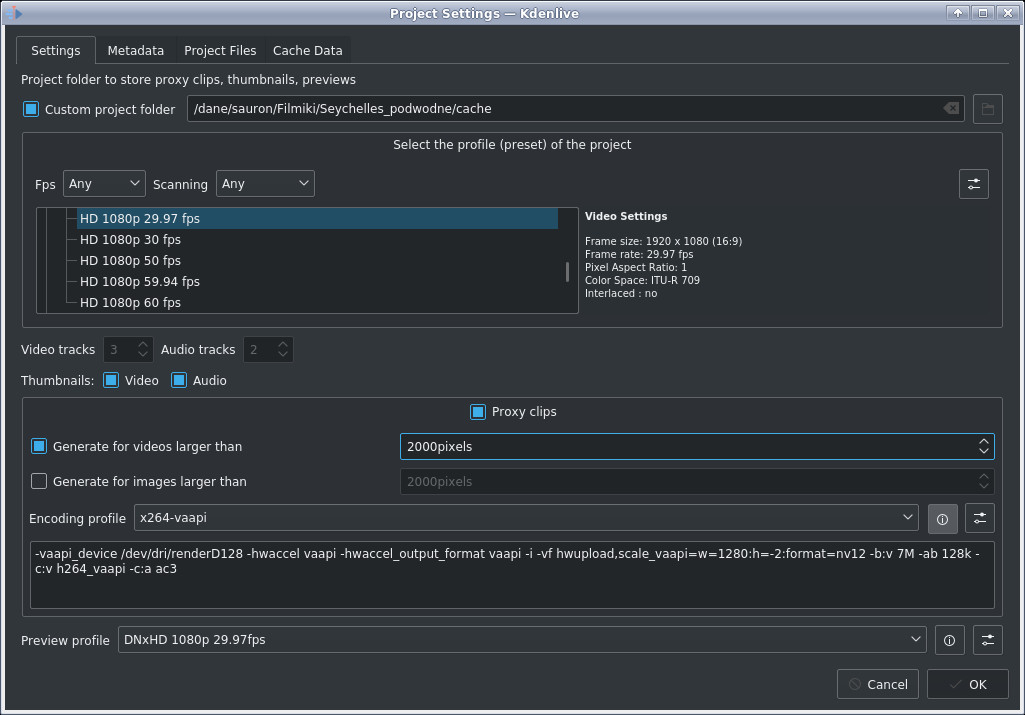
So Kdenlive can generate proxy clips, that are smaller and lighter representation of currently processed video files. With proxy you can see more (or more complex) video effects in real time. My computer was able to handle 1080p files directly (not in real time – but close enough to be editable), but since I switched to 4k … I was also force to use proxy :).
Anyway, proxy usage is straight forward. You can define it on project level, and mark if you want to have auto generated proxies for files with width larger then X pixels (yes, this is width – it’s not stated anywhere). Or you can right click mouse on clip, in video list, and check mark “proxy” (this also works for entire folder).
Ok, so the Internet is crawling with plenty of howtos for configuring different/many operating systems during boot with GRUB2. But I haven’t found the single one, how to make it depended on simple key press – not have to choose from GRUB menu.
So, in my case, I want to have boot up Linux/Debian all the time – as the default system, but from time to time, use Windows for Fusion 360 (or for gaming). Of course I can choose different OS from GRUB menu – like everyone else, but it would be much nicer and faster to simply press “shift” during boot and see Windows.
We use cookies to ensure that we give you the best experience on our website. If you continue to use this site we will assume that you are happy with it.


Recent comments