Browse Author: Sauron

PhotoTrap V2

ESP32-Cam based photo trap

So, we meet again – with esp32-cam board 😉 . My first encounter was rather disappointing. I’ve tried to used it for streaming, and the image was poor quality (OV2640) and what is more troublesome, the board itself was unstable.

Recently I had a need, for some kind of Photo Trap – to see what animals are finding food (that we left for them) close to my land. It could be moose or some kind of deer. Of course I could buy one, but where is the fun in it – and it would be probably much worst. The one I saw was old type, powered with four AA batteries etc. but it had also cellular modem used to send MMS with picture 🙁 in 21 century.

Continue Reading

Agregat prądotwórczy Smart (sm-01-3300inv) 3kW – krótka recenzja

Kilka moich spostrzeżeń na temat niniejszego agregatu. Szukałem czegoś relatywnie taniego i z sensownej jakości prądem na wyjściu. Szukałem czegoś powyżej 2,5kW by zasilić piłę (lub inne narzędzia w garażu).

Oczywiście najbardziej cieszył bym się z jakiejś porządnej Yamahy lub Hondy, a już zupełnie z dobrej instalacji fotowoltaicznej i akumulatorów LiFePo4, ale.. no nie ma warunków 🙂

Tak czy siak, Yamaha to dużo ponad 4kpln a taki Smart “tylko” 1,6kpln.

  • Generator działa – to pierwszy plus :), przetestowałem go na silnikach szczotkowych o mocy do 2000W – daje rade.
  • Przetestowałem całkowite, chwilowe obciążenie ciut ponad 3,5kW – piła, wyciąg, grzanie olejowe i ładowanie akumulatorów – było ok.
  • Działają zasilacze (laptop, modem, kamera), piły i kompresory – zarówno na silnikach szczotkowych jak i indukcyjnych.
  • Niestety wahania napięcia są wystarczająco duże, by było dostrzegalne miganie oświetlenia diodowego (jarzeniowe – mniej).
  • Jedyne co nie potrafiło pracować na nim w warsztacie, to przełączniki Sonoff (zwykłe S26 i x4) – ciągły reset, próbowałem zwiększyć im kondensatory na 5V – nie pomogło Okazuje się ze jednak działaja – mój błąd w konfiguracji.

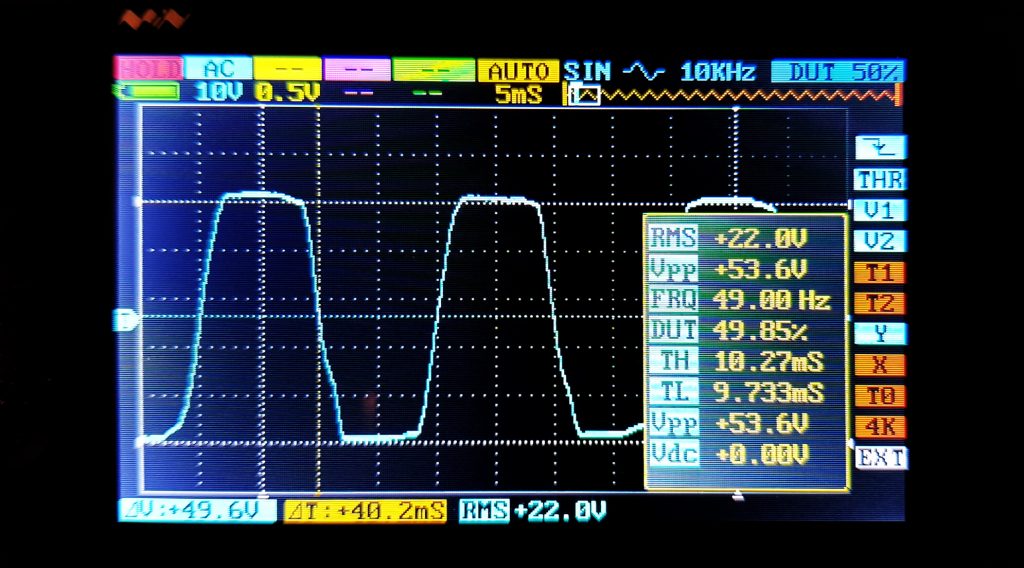
Jakość sinusa jest przyzwoita (ale daleka od “sieciowego” czy z inwertera sinus), wypełnienie i okres również – poniżej zdjęcie z oscyloskopu.

Parametry prądu z agregatu

Update – 29.01.2021

Po kilku miesiącach użytkowania mogę zdecydowanie polecić urządzenie. Przepracował powyżej 100h i wszystko jest w najlepszym porządku. Trzeba regularnie wymieniać olej i czyścić świecę – inaczej zdarza mu się zgasnąć. Ale do tej pory robiłem to 3 razy.

Głównie używam go w trybie Eco – przy obciążeniu ok 1kW. Ale przy pile i wyciągu czy kompresorze trzeba wyłączyć Eco (co niestety wiąże się ze spacerem do agregatu 😉 ).

Jedyne co bym poprawił to dodał jakiś autorestart samego generatora prądu. Bo jeśli przeciąży się agregat (głównie w trybie Eco – w normalnym nie udało mi się, ale też nie próbowałem), to niestety silnik pracuje dalej ale generator się rozłącza. W efekcie jedyny sposób na wznowienie pracy to restart całego agregatu, a to trochę upierdliwe.

Kankun smart plug OpenWRT upgrade

During recent cleanups of all my IoTs devices, I wanted to disable Kankun reporting to company servers (I’ve moved everything to customs firmwares like Tasmota or Espurna with House Assistant to manage it – so I don’t want any third parties) and also it seemed to be a good idea to upgrade OpenWRT on it.

If you haven’t seen this type of smart plugs it’s a little nifty device. Comparing to recent Sonoff type smart plugs – that utilize esp8266 (that I like a lot and use with all type of other projects – but mostly ESP32 now) – this plug has Atheros AR9330 rev 1 chipset with full OpenWRT Linux on it. If you want to do more, than just on/off operations it’s just perfect device.

Continue Reading

PIDKiln v1.2 update

I’ve just created v1.1 release of PIDKiln, and bumped development version to v1.2.

Most significant change in release 1.1 are:

  • replaced MAX31855 library with another one – it’s much cleaner and easier to modify
  • much better MAX31855 error handling, both with thermocouple and MAX31855 itself
  • introduced network logging with syslog protocol – so you can watch all debug information on remote host
  • all logging settings are now in Preferences
  • compressed local JS, and created separate Preference setting to allow remote downloading of JS scripts (Internet connection required – recommended to use)

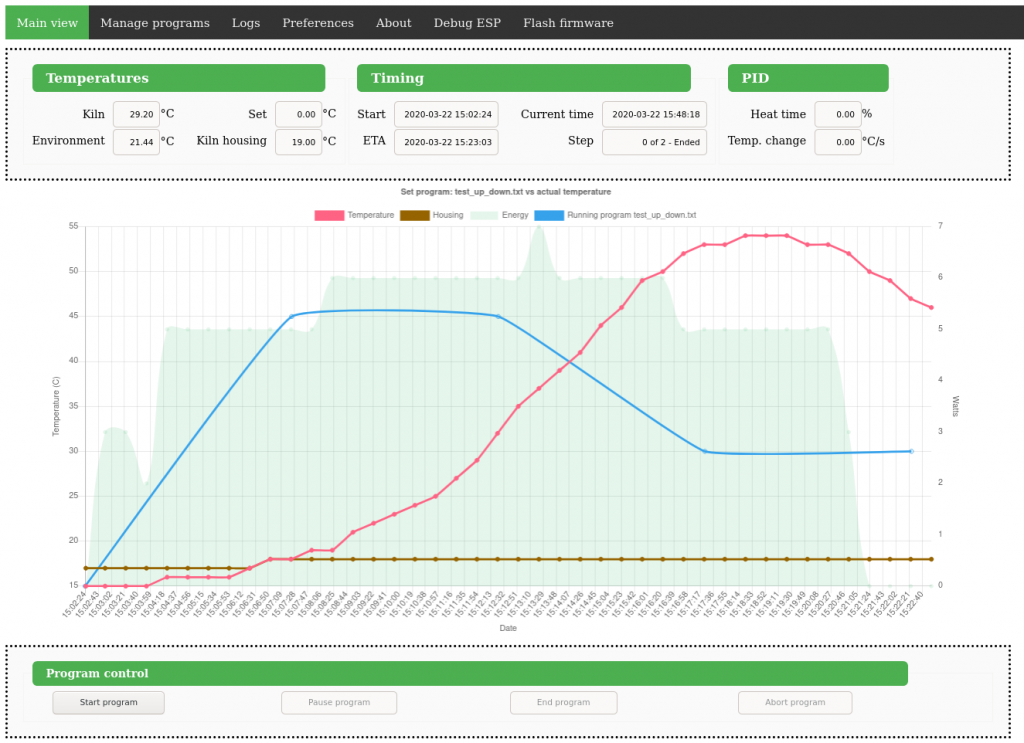
And I have also (after some 1.2 changes) first, real Kiln test run.

With two termocouples and power meters.

Source like always on GitHub.

Candle cnc 1.2b on Linux

If you would like to test latest (yet already quite old) Candle on Linux machine, you could face the same problems as I did – so few tips how to make it work.

I still think UGS platform is a better choice in many cases – but sometimes Candle may be necessity (I have found problem with UGS and Fusion 360 gcode files)..

Anyway, you may face this kind of compilation errors and configuration problems with latest 1.2b source code: Continue Reading

PIDKiln 0.9 – update

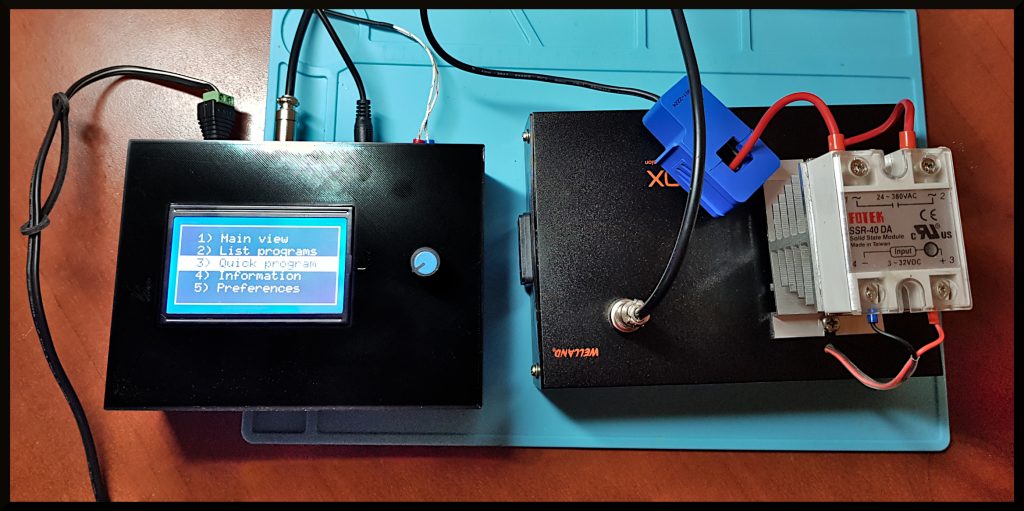
It’s time to make it look better, I don’t dare to say good :). So I’ve printed a case with all holes required, and now I’m soldering everything up.

I thought about creating dedicated PCB for it, but it probably would require double side one, and so far I’ve been only making one side PCB on my CNC mill. Other problem I’ve seen was the WiFi antenna on TTGO board. With single PCB for all components, It would be shielded either by PCB or LCD or wires. This board does not have external antenna connector (some other does). So I’ve decided I’ll put ESP32 board separately and at 90deg angle close to the plastic case. This way signal should be not blocked anyway. Continue Reading

PIDKiln v0.6 development – update

So far so good – most of the stuff is done. Currently I’m tuning PID usage, and what’s left is traversing program in time – but that’s easy.

To tune PID parameters and test it, you can use simple halogen light bulb (or car light bulb) connected with thermocouple. This is a good heat source to around 100C and it’s easy to see when it’s working 🙂

You just have to switch SSR to DC-DC one (for kiln you probably will use DC-AC). For easy testing I’ve prepared “Quick program” in LCD menu – where you can set one program step. Provide desire temperature, time and dwell – and you can run it.