How to charge your Xiaomi Mija M365 scooter from car or power bank.
Actually this is about making quick (as quick to build – not fast charging) car charger for you scooter, but there is nothing (except timeeeeee 😉 ) that forbids using it with QC/PD power banks or chargers – it will work, simply it will take ages to charge it.
It should also work for every other scooter (not just Xiaomi) – just check the required voltage and current.
Few bites of theory… task should (and IS!) very simple, we just need to bump voltage from 12V to 42V – right? Well, yes and not exactly. So this is true, we need to provide 42V for our BMS (battery management system) to charge battery, but since out car is “kind of” unlimited current source (from BMS point of view), we also have to limit the current. Otherwise the BMS will simply shut off with overcurrent charging protection.
Luckily we don’t have to do much, it’s enough just to find proper DC-DC step-up board with current limiter (CV/CC). I’ve found two of those , but you can use probably many others.
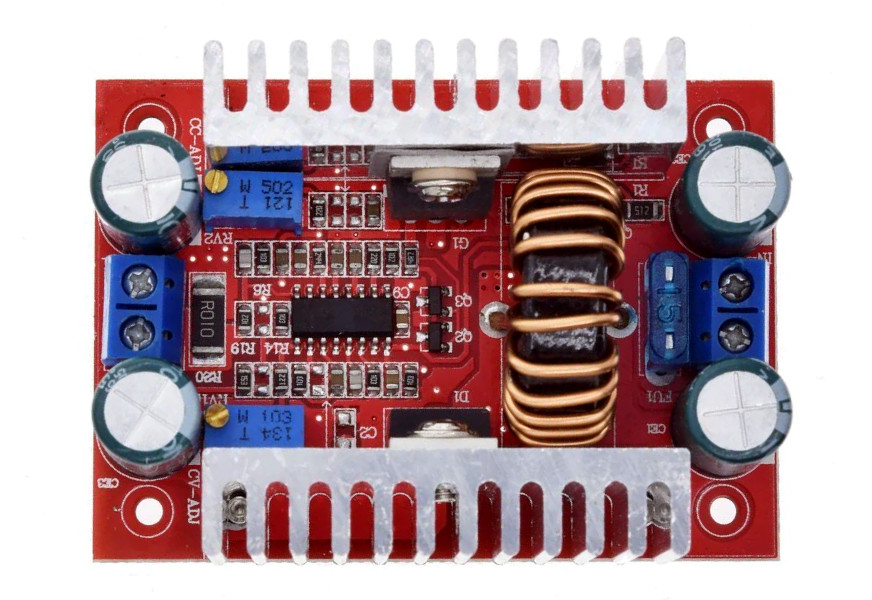

The red one is 400W and with some wider ranges, white one is 250W. Both will be ok, I’ve started with the red one. You should find it on Aliexpress for around 4-5$ each – I’ve provided direct links above, but I don’t know how long they stay valid.
Anyway, you will also need a M365 charge cable – you can try to do it on your own, or buy it for 2$. The problematic part is the plug – it’s (or at least I haven’t found) nothing standard. You should also get car lighter plug – but that’s trivial.
After screwing (not screwing up 😉 ) everything properly – just remember about polarity – grab your multimeter and connect converter (ONLY!) to car. Measure with voltmeter on output terminal voltage and screw upper blue potentiometer (it’s marked as CV) until you get required 42V. Kind of counter intuitive is that you gain voltage turning counter clockwise 🙂 – so be aware.
Now twist few times (let say 8), also counter clockwise current limiter (marked as CC) – so you will lower current a lot. Now connect ammeter on positive cable (you should also have it, for 5A or 10A in your multimeter) and connect scooter. It should start charging – if not it’s ok – perhaps current is too low. Screw clockwise CA potentiometer until you will get around 1.9A on your ammeter. And that’s it – you car charger for M365 is ready.
Just pack it up in some case and enjoy!
Since this converter will try to always keep the 42V output voltage, you can connect it to 19V laptop charger or PD power bank – it will convert it to 42V every time. The only problem can be too big current drawn and some (most) power banks will shut down itselfs – in this case you will have to lower current limit to somewhere around 1A or even less. But it will work!
I’ve prepared also crude, printable case for red board – look for it on Thingiverse.
One question…
Does the internal BMS act also as a CC-CV charger or is just doing cell balancing?
I’m building a similar setup, but using a solar panel. Now if everything is done internally and you only need to provide 42V, it’s no issue. But if the actual cc-cv charging is done via the brick, then a simple current and voltage controller, as shown in the post, would not be enough, as you’d also need a cutoff current setting, to actually a have a fully functioning charging circuit.
So, I don’t know if the internal BMS has some current limited capabilities – I wouldn’t count on it, but I haven’t tested it. I just vaguely remember some people mentioning that above 2A@42V may/will burn BMS – so I assumed it does not have any current limited capabilities. Having external power supply limited to 2A (or close to it) at 42V it’s enough to charge this (or those – if you have additional one as I) battery. This is how original “charger” works. I wrote “charger” because it’s simple power supply – without any fancy features – just 1,7A… Read more »
Oh, so it’s just a simple 42V brick. That’s what i wanted to know. Thank you 🙂
So nothing in the whole scooter is doing cc-cv, just cuts off charging when voltage limit is reached? thats odd, because that would mean a charged state of 80% at best (anything above you need constant voltage charging)..
AFAIK, Turn on the scooter, plug in the charger – the scooter will beep once and charging will start. During charging, the LEDs on the display will blink and the rear brake light will slowly fade in/out. Do not pay attention to the color of the LED on the charger, because the battery is not yet 100% charged, but the LED on the charge is already green. So, when the battery charge reaches 100%, the battery will start balancing, at this very time the LEDs on the panel (all four) and the rear brake light will start blinking frequently. After… Read more »